Do you find that your vocal recordings don’t sound as good as in professional mixes? That they lack clarity?
It’s true that recording vocals can quickly become challenging. There are many factors to consider, and achieving a good sound is more complex than one might think.
As a result, there are a lot of little techniques to know to get the best recordings possible. Even if you’re recording in your bedroom, you can optimize your sound captures from the start and thus simplify your vocal mixing work!
To save you some time, I’ve gathered these techniques in the article you’re currently reading 🙂
Of course, as usual in a studio context, it’s important to experiment. However, if you apply these tips correctly, you will undoubtedly notice a significant improvement in your recordings.
The Most Important Thing is Distance
Yes!
How many times have I wanted to record too close or too far from the microphone! And each time, I ended up with results that were almost discouraging…
Fortunately, if you know where to position yourself, everything improves!
On average, a distance of 20 to 25 centimeters from the microphone is a good starting point.
If you move away, you will highlight the natural reverb of the room, which is rarely good in amateur home studios since rooms rarely have suitable acoustics for singing. However, depending on the music style, it can be useful to have that kind of sound.
For more intimate music or for rap, for example, it is interesting to get closer to the microphone (10-15 cm) to take advantage of the proximity effect. This means that the closer you get to a microphone, the more bass is emphasized.
You can thus use this effect to your advantage to add warmth to a voice. However, be careful not to lose intelligibility!
The Microphone Angle
We often tend to place the microphone directly in front of the singer, right in line with their mouth.
I am largely guilty of this, I admit.
However, it is useful to experiment a bit with the microphone angle. For example, instead of singing directly into the capsule, aim a bit to the side. Or, position the mic a little lower and angle it towards your throat (or that of the singer you are recording).
This kind of approach will help you eliminate sibilance (the hissing sounds like the “s” in the word “snake”).
In short, don’t hesitate to do a few tests like this before starting the recording until you find the sound you need.
The Pop Filter, an Indispensable Accessory

Essential if you plan to record vocals in good conditions.
A pop filter is simply a nylon or metal filter that is placed in front of the microphone.
Its primary function (the one everyone knows) is to limit plosives. That is, the percussive sounds produced when pronouncing the letters “b”, “p”, etc.
Most microphones tend to be very sensitive to these sounds. With a pop filter in front of the mic, the problem is solved – and the quality of your recording is instantly improved.
However, this filter has a second, sometimes underestimated, purpose: to protect the microphone capsule. Indeed, when you sing, there is always a bit of saliva projected towards the microphone – even if you don’t realize it.
Now, the capsules of some microphones are very fragile and particularly sensitive to moisture. This is especially true for condenser mics. Thanks to pop filters, you will significantly extend the life of your equipment by minimizing the amount of moisture reaching the capsule.
Handy, right? 🙂
If you already have one, that’s perfect.
► If you don’t have one, then hurry up and get one, for example by checking out the selection of Projet Home Studio anti-pop filters.
Reduce mouth noises

Clicks and other mouth noises are most often heard during spoken or sung passages at low volume.
Removing them during mixing, once the recording is done, can quickly become exhausting.
Not to mention the time wasted…
Fortunately, there are a few tricks to limit these noises.
First of all, avoid drinking anything that tends to dry out your mouth. For me, I find that coffee in particular should be avoided, but sugary drinks are also a very bad idea.
On the contrary, try to hydrate with simple drinks like water, tea, or apple juice. By the way, as silly as it may sound, eating green apples often helps to minimize mouth clicks.
Room acoustics
The problem with small home studios is that there is rarely enough space to arrange the area as one would like.
Ideally, you should position acoustic treatments to limit sound reverberation on the walls. This would allow you to make more neutral vocal takes.
To learn more about acoustic treatment for a studio, check out this guide.
If that’s not possible, a very practical and relatively inexpensive solution is to get an acoustic screen. You know, those half-circle structures that position behind the microphone (like this).
It won’t be perfect, but it will limit reflections from the wall facing you, and thus improve the sound captured by your microphone.
Tip: contrary to what is sometimes heard, it is not a good idea to record in a closet or under a blanket.
Indeed, if the space is really “dead”, without any reflection, then your recordings will not have a natural sound.
Even worse: if the space in which you are recording has not been properly treated (for example, only half is covered with a blanket), then reverberations will still be picked up by your mic. The problem is that they will be very short and very unpleasant to the ear. To be avoided at all costs!
The atmosphere
Improving voice recordings doesn’t just mean applying mathematically proven techniques.
Indeed, the singer’s performance is also to be taken into account.
For you to give your best (or that of the friend you are recording), it is important that you feel comfortable.
The atmosphere of the room is therefore very important.
Make sure it is warm enough and that the decor is pleasant. If you need to read the lyrics, make sure you can do so while singing, without having to adopt an uncomfortable posture.
If you are recording someone you don’t know well, don’t hesitate to provide a bottle of water (and some apples, by the way, if you’ve read the article well 😉 ). It will help them feel confident to sing in good conditions.
I hope you’re not forgetting the warm-up?
How many singers do not take the time to warm up before recording their song at home?
Many more than one might think.
Yet, warming up your voice is essential. First of all, to avoid damaging your vocal cords – but also for the quality of the performance.
For example, if you come in from the cold (which is particularly relevant at the time I am writing this) and want to record directly, you probably won’t be able to give your best. You will lack power, your notes will be less precise — the symptoms are numerous.
So, take the time to warm up, and you will see that in general your recordings will be greatly improved. If only because you have refreshed the lyrics in your mind!
Tip: I hope you are also recording your test takes, right? You never know, it’s possible that from your very first take you do something amazing, but then you can’t replicate it later! So, record everything 🙂
Multiply the takes
Exactly – speaking of takes.
Don’t think for a second that your favorite singers record their songs in one go.
In fact, for vocals, it is common practice to do “comping“, which means compiling multiple recordings to produce an optimal final version.
Let’s imagine you record two phrases. On the first take, you sing the first one well but the second sounds a bit off. On the second take, however, it’s the opposite.
All you have to do is combine the first phrase from the first take with the second phrase from the second take to get a perfect final version (I hope you’re following me with all these numbers).
If you want to improve your vocal recordings, don’t hesitate to do as many takes as necessary! At least two or three — to give you multiple options during mixing.
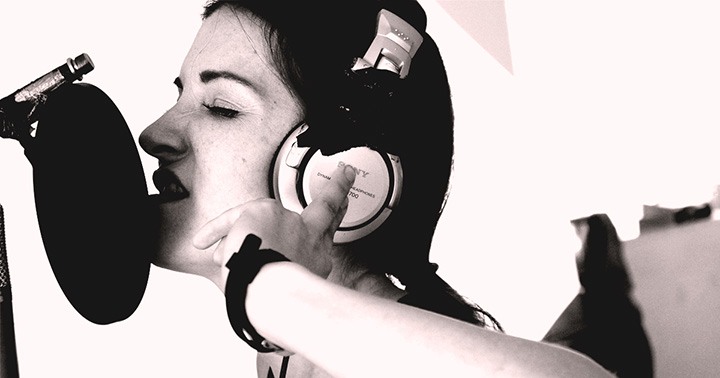
Opt for closed headphones

As you may know, some studio headphones are open, while others are closed.
As a result, the former tend to let sound escape outside, while the latter are more isolating.
If you use open headphones to listen to your track while you sing, the sound from the track will leak and may be picked up by your microphone.
If it’s at a very low volume, it’s not too bad — that said, it’s better to have the cleanest recording possible.
With closed headphones, however, the problem is solved!
And of course, the microphone

Indeed, the distance and angle of your microphone are absolutely essential for a good recording. The same goes for the acoustics of the room or multiple takes — in short, all the tips presented above.
However, if you have a bad microphone that is not suitable for singing, you’re not starting under the best conditions.
If you have no choice: no problem, I strongly encourage you to keep the one you have and especially not to stifle your creativity due to sound issues.
However, if you have the opportunity, I can only recommend investing in quality equipment proven for vocal recordings. You might start by taking a look at my selection of microphones suitable for singing — that should be a good starting point.
► Continue reading: How to record a voice / singing?