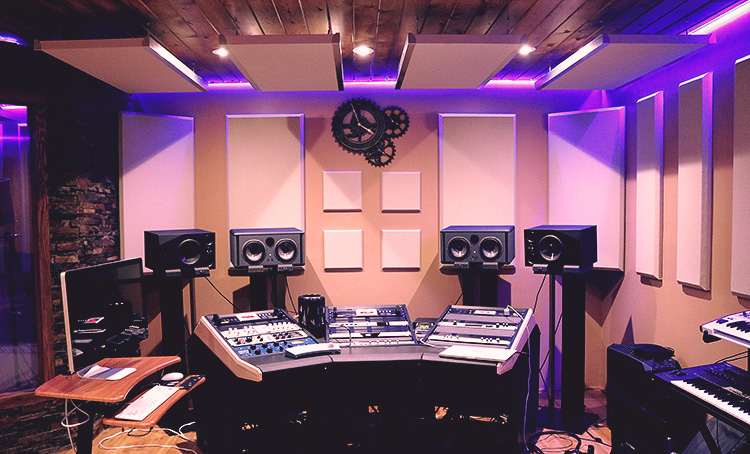
The acoustic treatment of a room is absolutely essential for any studio or home studio that respects itself, as soon as you use monitoring speakers.
But what should you install? Should you put up foam acoustic panels? If so, how many? And where should you position them?
This guide will, I hope, answer all your questions! 🙂
If you still have questions after reading, feel free to ask them by leaving a comment at the very bottom.
Here are the different topics we will cover:
- Acoustic treatment, what is it for?
- Measuring the room
- Optimizing the room before treatment
- Controlling reflections
- Mastering the bass
- A brief summary
Before or after reading the article, feel free to also watch this video:
Acoustic treatment, what is it for?
By default, no room is balanced in terms of frequencies and reverberation.
If you take your guitar and play in a cathedral, you will not hear the same sound as if you play in your living room.
This is due, in particular, to the difference in room size as well as the construction materials used. A drywall partition will not react the same way to bass as a one-meter-thick stone wall, that goes without saying.
If in everyday life we don’t pay too much attention to such details, it becomes a critical issue if you are recording and mixing your music in a (home) studio.
Without acoustic treatment, your mixing decisions will necessarily be skewed.
Indeed, if your room does not react uniformly, it will be impossible to achieve a balanced mix since what you hear will be imperfect.
Concrete example: if your room generates abnormal resonances in the bass (like all rooms, by the way), you will mistakenly attenuate the corresponding frequencies during mixing, thinking they are too strong. But as soon as you listen to your mix in another room, you will feel that your bass has disappeared.
The same problem arises for recording: if your room has too pronounced a reverberation, it will be picked up by your microphone, affecting the quality and balance of your recordings. And this, even if your microphone costs €2000!
Fortunately, all these problems can be corrected or minimized through acoustic treatment.
But be careful! Don’t rush to buy a kit of acoustic foam to put on all your walls!
Treating a room is a bit more complicated — and above all, you need to take the time to understand what each type of treatment is for to avoid wasting money! 😉
Measuring the room
One might think that the acoustic treatment of a room is just about positioning the right acoustic panels in the right places, and that after that everything is finished.
Unfortunately, no.
You need to measure to see if the modifications you make are useful – or at least that they do not harm the acoustics of your studio.
Certainly, a first test would be to clap your hands loudly and listen to the room’s response. If, for example, you hear a certain metallic resonance, that’s a bad sign; you will need to add acoustic treatment.
That said, quickly, this method will not be sufficient, and you will need to move on to real measurements. Don’t worry, there is a way to do this for not very expensive — €29 exactly, at the time I am writing this.
To measure the acoustics of your room, you indeed need two things:
- a microphone;
- measurement software to analyze the results.
For the microphone, I recommend the ECM8000 from Behringer. It’s a very high-performance measurement mic for the price, which is almost as good as those from other brands ten times more expensive.

► See the price of the ECM 8000 on: Thomann – Woodbrass – Amazon
If you wanted to make ultra-precise measurements for an auditorium or an international studio, then yes, I would recommend something more powerful. But for a home studio, the ECM8000 will do just fine (just look at the graphs at the bottom of this page to be convinced: it has a very flat frequency spectrum and is completely comparable to more expensive models).
As for the software, good news, there is a free one that will cover all the features you might need. It is REW — Room EQ Wizard.
You can download it by clicking here.

Its use being a bit complex, I recommend reading my tutorial on acoustic analysis of a studio with REW first.
In short, thanks to these two tools, you will be able to measure the acoustics of your home studio without any problem as you add treatments, to ensure their effectiveness.
Optimize the room before treatment
Before you start installing acoustic panels or bass traps (don’t worry, everything will be explained a bit later), it is important to start on a good foundation by optimizing the listening position.
I first recommend reading my article on the positioning of monitoring speakers. It will provide you with a maximum of elements to head in the right direction.
However, in summary and to recap the main points, your listening position is theoretically ideal if:
- it is symmetrical relative to the speakers;
- it is positioned at 38% of the length of the room;
- there are no obstacles between your ears and the speakers.
However, this is just a starting point. By taking measurements, you will undoubtedly identify some problems. From there, try to change something. For example, move your desk 10 centimeters closer to the wall. Take a new measurement.
Is it better? Is it worse?
When you have identified the best position for your speakers and yourself — that is, the one with the least problems — it is time to move on to the acoustic treatment itself.
Control reflections
The acoustic anomalies of a room can be divided into two categories:
- problems of reflection in the mid and high frequencies;
- problems of modal resonances in the low frequencies.
For each type, a specific acoustic treatment will need to be implemented.
Let’s first look at reflections.
The phenomenon of acoustic reflection
This is the phenomenon that is easiest to notice. Just clap your hands or speak in a room to hear the sound bounce off the walls and create an echo effect.
This is referred to as flutter echo.
Not surprisingly, the sound coming from your monitoring speakers or the instrument you wish to record will also reflect off the walls.
In other words, you will hear a combination of the original sound and its multiple reflections.
This is what is represented in the diagram below:

As you can see, the sound travels in a straight line to the ears of the person sitting in the listening position, but it bounces off the walls. Here, to keep the diagram simple, we only see the reflection on the front/back walls, but we must not forget that reflections will occur on the side walls, the floor and the ceiling, on the furniture…
This echo phenomenon will unfortunately generate two main problems:
- The reflected sound waves will likely not be in phase with those coming directly from your speakers, which will create interference. The sound you hear will therefore not be faithful to what was emitted by your speakers. This is a phenomenon of comb filtering.
- Your perception of the stereo image will be distorted: as you already hear too much of the natural reverb of your room, you will particularly struggle to accurately adjust the level and the settings of your reverb plugins.
Simply put, your mixing decisions will be skewed because you will not be able to distinguish between the sound coming from your speakers and the sound reflected by the walls of your room.
Solution #1: Absorbing Acoustic Panels

The simplest and most well-known solution to this problem of reflection in the mid and high frequencies is to use acoustic panels.
Positioned at strategic locations in the room, they will help to limit reflections by absorbing the sound waves reaching them.
How to position your absorbing panels?
Don’t rush to put them everywhere in your home studio, as you will first need to identify the places where they will be most effective.
These places are the so-called “first reflection” points. That is, the areas where the sound waves emitted by the speakers are reflected for the first time.
But how do you know where these areas are located?
Simply by using the mirror technique:
- Sit in your listening position;
- Ask a friend to hold a mirror against the wall to your right, at the height of the speakers;
- Ask them to move it along the wall;
- As soon as you see a speaker, you have found a reflection point. This area will need to be treated with an acoustic panel.
- Continue searching for first reflection points until you have seen both speakers in the mirror.
- Repeat the procedure for the left wall, as well as for the back wall if you also want to treat it with absorption.
In images:

In addition to installing these acoustic panels on the walls, it is generally advisable to add a “cloud”, that is, a suspended absorbing panel above the listening position. Indeed, in all acoustic treatment, one must always think in three dimensions, and not forget that sound can also be reflected by the floor or the ceiling.
That said, be careful!
You must not make the room completely dead by covering all the walls with absorbing panels! We see this from time to time in home studios, but it is a very bad idea.
To have a rough idea in mind, think that on average it is advisable to treat only 30 to 50% of the walls of the room.
Acoustic panels, yes, but made of what material?
Acoustic panels can be made from different materials, all of which have different acoustic absorption capacities depending in particular on:
- their density (weight divided by volume);
- their air permeability, in other words, the ability to let air filter through.
Among these materials, first of all, we find acoustic foams.
Personally, I’m not a big fan, and I’ll explain why: generally, acoustic foams are very effective at absorbing high frequencies, but as you go down into the mids/lower mids, they hardly absorb at all. So, if you clap your hands in the middle of the room, you might feel that the acoustics are better, because you hear less of the reverb from the highs. However, this will only be a very partial improvement, and your room will still be poorly balanced.
Therefore, it’s a material that I would tend to advise against.
In particular, absolutely avoid the cheapest foams, like those found on eBay. They are generally of poor quality, and sometimes even do not meet certain fire safety standards, which can be quite dangerous.
On the other hand, and even though I speak a bit poorly of this material, Auralex foams are still nice and of good quality.
You can for example get a kit like the Roominator D36:

► See the price of the kit on: Thomann – Woodbrass
Another type of foam that I really like: Basotect. It is a material made of melamine resin manufactured by BASF, a very well-known German brand in the construction field.
Basotect foams are very effective. Not perfect in the lower mids, but they will truly help you control the reflections from the walls of your (home) studio.
The brand Hofa, also German and easy to find in France, uses this material. The prices are indeed higher than low-end foam, but you will really get a good quality product.
For example, take a look at their HOFA Absorber panels, which have a sober design and the advantage of being available in a large number of colors.

► See the price of the panels on: Thomann
In professional studios, you often find a very different and much more effective material, namely mineral wool (glass wool or rock wool).
Two options are available to you: make panels yourself, or buy ready-made ones.
The first solution is probably the least expensive. You just need to place mineral wool in a wooden frame and cover it all with acoustically transparent fabric. However, you need to be careful about the wool you choose, as some are more effective than others for acoustic absorption.
The second solution, undoubtedly the simplest if you’re not very handy with hammers and screws, is to buy ready-made panels. There are a number of different brands, but this time I would tend to recommend the brand GIK Acoustics, whose products are also easy to find in France/Europe (and probably in Quebec).

Visit their website directly to see all the available models and their prices: gikacoustics.fr
Finally, if you’re not a big fan of putting mineral wool in your home studio (especially if it’s your bedroom), other materials exist, but you will of course need to build your panels yourself.
For example, in my studio, I mainly use panels made from Caruso IsoBond, an excellent material but a bit difficult to obtain in France.
Maximizing the usefulness of your acoustic panels
To optimize the effectiveness of your acoustic panels, you must first ensure that they have an adequate thickness. Generally speaking, if they are less than 10 centimeters thick, they may not absorb enough in the midrange. If they are 2 centimeters thick, they will be almost useless, except in the high end of the audio spectrum.
Indeed, the amount of material is extremely important. As a result, the cuts seen in some acoustic foams are ultimately not really useful, as they cause you to lose thickness…
Finally, if you have the possibility, try to keep a space between the panel and the wall: this will allow for a bit more absorption in the low frequencies.
It is important to experiment, but for example, for a panel that is 10 cm thick, I would recommend keeping it 10 cm away from the wall as well.
Solution #2: Acoustic Deflectors and Diffusers
Absorption is not the only method for controlling sound reflections in a room: there is also acoustic diffusion.
Where absorbers will prevent reflections, diffusers will redirect sound waves in more or less random directions to avoid them bouncing endlessly between two parallel walls.
The goal of diffusion is therefore to contribute to the balance of the room and improve the acoustic characteristics of the listening position by dispersing sound waves.
Types and Materials of Acoustic Diffusers
If you want to install panels that diffuse sound waves in your home studio, you will mainly encounter two types: deflectors and diffusers.
Deflectors correspond to panels whose surface is not parallel to the wall. They redirect sound waves that hit them in the same direction, regardless of their frequency.
On the other hand, diffusers generally have a more irregular structure, with holes or cavities that will allow them to redirect sound waves in a different direction depending on their frequency. These irregular structures are based on mathematical calculations to be effective for all frequencies.
Between these two types of panels, diffusers will generally be the most effective.
In terms of material, the choice is potentially less critical than for absorbing panels. That said, wood is often found, which combines an aesthetic aspect with a real ability to reflect sound.
This is, for example, the material used by GIK Acoustics for their “Q7d” diffusers:

Visit their site for more information on these panels.
As with absorbing panels, you can of course make them yourself, for example with thin plywood sheets. However, a simple and much more effective alternative than it seems is to install a bookshelf (like Ikea) with books where you want to have diffusion.
Make sure that the books are more or less pushed in, so that they do not create a flat surface but rather a surface similar to commercial diffusers. It won’t be perfect, but it will be better than nothing! 🙂
Positioning Your Diffuser Panels
If you are new to acoustic treatment, I recommend initially installing absorbing panels in your studio: the choice of their position is easier.
Indeed, the positioning of diffusers will depend on your choice and your measurements. For example, alternating absorbing panels and diffusers is a good way to balance the acoustics of the room without making it dead.
Another good idea, found in some professional studios, is to follow the “Live End Dead End” method, which involves fully treating the wall facing you (behind the speakers) with absorption, while the wall behind you is treated only with diffusion.
However, note that if you dedicate an entire wall to diffusion, it is recommended to use as many diffusers as possible for them to be truly effective.
Master the bass
We often say, “Ah, that’s it, I’ve installed my absorbing panels, there are fewer reflections, it’s good I’ve treated my studio.”
Yet, absorbent panels are generally only effective above 250 Hz.
What happens below that?
Well, low frequencies actually constitute the biggest acoustic problem in studios and home studios — which is also the most complicated to correct.
Let’s start with a bit of theory…
Modal Resonances & Standing Waves
Your room will resonate particularly for certain frequencies, which are called modes. We refer to these as modal resonances.
These modes depend on the dimensions of your studio — and they will pose a real problem.
Imagine a sound wave continuously emitted by one of your speakers, at a frequency corresponding to one of these modes (let’s say, 100 Hz). It travels across the room and is reflected by the wall.
On the way back, it will “collide” with the signal still being emitted (since we said it was being broadcast continuously).
The two waves will then combine, creating at the same time a standing wave (standing wave in English), which will look like the diagram below:

If we say that the speaker is on the left and the wall is on the right, you find:
- in blue the emitted signal;
- in red the reflected signal;
- in black the resulting signal, made up of the addition of the first two.
What happens?
As you can see:
- at the red points, the emitted signal and the reflected signal are always out of phase. Inverted, in a way. When combined, they will produce a null signal. Zero sound. We call these points Nodes (or Nodes).
- in the middle between the red points, on the contrary, the signal will always be perfectly in phase. The resulting signal will therefore be twice as strong (that is, +3 dB). We call these points Antinodes (or Antinodes).
Depending on the frequency and the dimensions of your studio, the position of the nodes and antinodes will of course be different.
If you remain seated at your listening position, you will notice that some frequencies dominate while others tend to disappear.
If you move around the room, you will make the same observation — but not for the same frequencies!
You guessed it: without acoustic treatment, your mixes will be unbalanced, as you won’t be able to accurately judge the level of the bass!
Identifying Room Modes
The modes exist in three dimensions: length, width, and height. At least, for axial modes, since there are also tangential modes and oblique modes, depending on the number of reflecting surfaces involved.
But rest assured: only the axial modes will interest us. They are already complex enough to deal with.
How to identify the axial modes, then?
There are three possibilities that I will detail for you.

Option 1: Use a Calculator
It is possible to calculate the position of the modes and especially their frequencies based on the dimensions of the room, using some mathematical formulas.
There are several online calculators, but they are not always very clear or in French. So I took the opportunity to build one in Excel format that you can download with the following link:
Click here to download the modal resonance calculator
All you need to do is enter the size of your room at the beginning of the file, and automatically your modes and the information you need will be calculated.
However, be careful, you should always take the theoretical results “with a grain of salt” because depending on the thickness of your walls, the construction materials… it is possible that some frequencies do not react the same way.
Option 2: Use a Frequency Generator
To better understand how your room resonates, the simplest way is to use a sine wave generator. I particularly recommend the Online Tone Generator by Tomasz P. Szynalski, completely free and very easy to use.
- Set yourself up in your listening position and launch the application;
- Progressing 1 Hz by 1 Hz, go through all the frequencies between, say, 25 Hz and 300 Hz;
- Note on a sheet the frequencies that stand out too much, or on the contrary seem to disappear.
These are the modes of your room.
No more, no less.
Option 3: Measure
The previous exercises are great for understanding how your room/studio/home studio works.
However, I also recommend that you take measurements to obtain more accurate results. Especially since, if you followed my initial advice, you already have (in theory) all the equipment to do it. 🙂
So measure the frequency response of your room, without acoustic treatment, between approximately 20 and 300 Hz.
You will get something like this:

With this type of graph, you will be able to precisely determine the frequencies causing problems. In the image above, you can clearly see certain modes, which I have circled in orange:
- 115 Hz (abnormal dip)
- 130 Hz (abnormal peak)
- and 205 Hz (dip).
Note that between the first two, very close in terms of frequencies, there is still nearly 30 decibels of difference!
With acoustic treatment specifically targeting the lows, you will be able to partially correct these issues.
However, keep in mind that it will be impossible to achieve a completely flat spectrum: if you manage to have variations of +/- 5 decibels, that will already be excellent.
Solution #1: The Room
If you work in a home studio, you may not have (probably) much choice in the room where you mix your music.
That said, I think it’s important to clarify a few points that may be useful if you move or if you are currently looking for the best room to set up your equipment.
The Shape of the Room
Axial modes, which generate the resonance problems we talked about, appear when two surfaces are parallel.
If you have the option, try to set up in a room where the walls are not quite parallel, to minimize the modal resonance phenomenon.
In a home studio, of course, you rarely have a choice. And doing renovations is not always a good idea: sure, you can break the parallelism with drywall, but depending on their thickness, they may not always have the desired effect on the lows.
The Size of the Room
We mentioned earlier that the frequency of the modes depends on the dimensions of the room.
So, if your room is perfectly cubic, you will find identical modes in the three dimensions length/width/height.
The impact of modal resonances on the sound you hear will then be multiplied.
I would even say: in this situation, it’s impossible to treat the room properly!
To set up your home studio, therefore, prefer a room where the length, width, and height are all different, avoiding multiples (for example, avoid setting up in a room that is 6 x 4 x 2 meters).
Solution #2: Bass Traps
The best way to minimize the effect of modal resonances in your studio, is to install bass traps.
In other words, specific devices aimed at absorbing the lows.
Paradoxically, by absorbing the lows you will probably reinforce them. Let me explain: as we just saw, you are faced with modes that generate significant level losses at certain frequencies and in certain areas of the room. Some frequencies can thus be found at -20 or -30 dB without any problem.
If you install bass traps, the low sound waves will be absorbed. And as a result, the level losses you noticed will be less pronounced. The result: the perceived level of the lows increases.
Types of Bass Traps

Bass traps come in many shapes and types. There isn’t really a classification, but generally, you will find two types:
- Classic bass traps — which will absorb more or less all frequencies (depending on their thickness) and convert sound energy into heat to dissipate it. In this, they function similarly to the absorbing panels we discussed earlier.
- Resonant bass traps — much more specialized and rarely used in home studios, which are tuned to correct a particular frequency.
So far, nothing too complicated.
Initially, installing classic bass traps should be sufficient.
That said, it is important to ensure they are made from the right material and installed in the correct position.
What material for my bass traps?
The effectiveness of your bass traps will be largely determined by the material they contain.
Avoid acoustic foam.
Even high-quality foam, even the Basotect foams I mentioned earlier.
For low-frequency absorption, this material is simply not dense enough, not effective enough.
It is much more relevant to use bass traps containing mineral wool (Ecose for example), or Caruso Isobond, which is also very good. Indeed, these materials have density and air permeability properties much better suited for absorbing low frequencies.
Furthermore, note that bass traps often have a fine reflective surface that allows them to reflect sound waves from the mids and highs. The idea is to not absorb anything other than the lows, to avoid making the room’s acoustics too dry since you will already have panels dedicated to absorbing mids and highs.
Which bass trap model to choose?

Some bass traps have a triangular shape, which will fit into the corners of your room. Others, on the contrary, are in the form of panels that will be positioned diagonally, in the corners.
In both cases, you have of course the option to make them yourself, DIY style, or to purchase commercial models.
The first solution is quite simple, as it just requires building a panel or a triangular structure filled with an appropriate material.
That said, especially if you want something well-crafted, commercial bass traps are also a very interesting option.
In particular, I recommend taking a look at the bass traps from Hofa Akustik, which in addition to being very aesthetic are also very effective:

► See the price of these bass traps at: Thomann
Otherwise, the Bass Trap 244 from GIK Acoustics is an interesting alternative if you are looking for something with a more classic shape.
Positioning bass traps
Positioning bass traps in the right place is crucial, to maximize their effectiveness.
There is only one option: the corners of the room.
Indeed, the goal is to intervene with minimal treatment on a maximum of modes. By placing your bass traps in the corners, you will be able to absorb in at least two directions: width and length.
And if they are positioned really in the corners and not at mid-height in the angle, they will also absorb low frequencies in a vertical dimension (in height). In theory, the same bass trap can therefore influence all the axial modes of the room.
However, it is important to understand that one alone will not be enough to address all your bass issues: it is entirely possible that you will need about ten of them to really achieve a positive result.
Why?
Simply because the amount of material is really important. The more mass (such as mineral wool), the more the bass will be absorbed.
Fortunately, there is still a little technique to maximize their effect: by spacing them a bit from the walls, your bass traps will be able to absorb even lower frequencies.
Resonant bass traps
As I mentioned a little earlier, resonant bass traps are somewhat more specific devices that are rarely found in home studios.
This type of solution is particularly useful if major problems are identified below 100 Hz, as these are much more difficult to correct with standard bass traps.
There are several types of resonant absorbers.

Some, like the Helmholtz Resonators, are containers of specific shapes that allow for very precise control of resonances. The acoustic principle behind it is similar, in fact, to blowing across the neck of a bottle.
Other resonant absorbers resemble classic bass traps built around membranes of specific dimensions/thicknesses. These resonate when certain frequencies are transmitted to them, which diffuses the sound wave into the material positioned around (mineral wool…) and thus facilitates its absorption.
► To learn more about this topic of managing low frequencies, visit my guide on bass traps.
In summary
Having suitable and good quality acoustic treatment for your room is crucial, both for mixing (if you use monitoring speakers) and for recording.
Two main problems are found in all rooms:
- problems with reflections in the mid/high frequencies, which alter the perception of stereo image and frequencies. To control reflections, absorbent panels made ideally from mineral wool are primarily used, and sometimes reflective panels.
- modal resonance problems, which generate significant peaks and “holes” in the low frequencies, depending on the position in the room. For these, specific acoustic treatment must be implemented: these are the “bass traps,” generally positioned in the corners of the room.
To avoid unnecessary treatments or those that could harm the quality of the acoustics, it is strongly advised to measure the room with a specialized measurement microphone (some entry-level models are more than sufficient for a home studio). By doing so, you can ensure that the acoustic treatment you purchase or build will be used optimally.
Now — it’s your turn!
With the information from this guide, you are equipped to start treating the acoustics of your studio, even if it is a very small room or your bedroom.
And if you don’t yet have the budget to treat it completely, you can always start, for example, by placing a few acoustic panels to eliminate the first reflections — that will already be a very good first step!
And to go further…
There is only one French-speaking training that I recommend (I have actually tested it in an article here), as it is both very clear and very comprehensive: it is the SawUp training conducted by Xavier Collet (who is also a certified Ableton Live and Native Instruments trainer).
It truly contains all the information you need to approach acoustic treatment for your home studio, studio, or audiophile room with confidence (and especially with a complete understanding of what you are doing).
► Click here to learn more about this training called “Acoustic Solutions for the Musician, Sound Engineer, and Music Lover”.