Reverb or reverberation is one of the effects that you absolutely must master to be able to mix audio, just like equalization or compression.
It’s almost impossible to imagine a mix that wouldn’t use this effect at least once.
But concretely, what is reverb? What is it used for? How to use it?

I propose to answer all these questions in this article, which is structured as follows:
What is reverb?
As an introduction, I find that the definition given by Larousse of the phenomenon of reverberation is a pretty good starting point:
Reverberation (n.f.) — Persistence of a sound in a closed or semi-closed space after the sound source has stopped.
Indeed, it refers to the notion of sound persistence: this means that it is something particularly important.
However, let’s try to clarify it a bit in this chapter.
Reverb explained through echo
Imagine that you are on a mountain.
You shout very loudly.
A few seconds later, your voice comes back to you distinctly, allowing you to understand each word spoken with a certain clarity.
That is the phenomenon of echo. Your voice has bounced off the mountain across from you, for example, and has returned to you.

Now imagine that you do the same thing in a cathedral.
This time, you will not hear a single echo, but rather a multitude of echoes generating a kind of resonance that lasts over time.
More precisely, your voice bounces from wall to wall until the energy of the sound wave has dissipated — the sound that reaches you is therefore made up of a series of echoes.
But this time, unlike the case with the mountain, you cannot distinguish the different echoes: they form a sound that your brain perceives as unique, which lasts for a certain time and has a frequency response that varies over time (typically, the highs tend to disappear first).
Note: to be able to distinguish two sounds from each other, it is generally considered that there needs to be a gap of 20 to 30 ms (milliseconds) between the two.
Below this threshold, the human brain tends to have the impression that there is only one sound.
Well, this phenomenon, is exactly what we call reverberation or reverb in sound engineering jargon.
Of course, I took the example of the cathedral because it is illustrative, but all rooms have their own reverb: in the case of the cathedral, the reverb is long given the size of the building, but in your room or in the room where you are right now, there is also a reverb, which is probably shorter.
Only dead rooms like that of IRCAM do not have reverberation (or at least, it is infinitesimal).
The concept of early reflections
To better understand the phenomenon of reverb, I suggest we delve a little deeper into its composition, based on the following graphic:

As you can see, you first have the direct sound: this is the sound emitted by the sound source that arrives directly, thus without being reflected, at the microphone or to the person listening.
Next, there are the “first reflections,” also known as early reflections. These are the very first sounds reflected in the room that reach the listener — in other words, these reflections correspond to sound waves that have bounced only once off the walls of the room.
These first bounces will generally stand out distinctly, almost like echoes, and will unconsciously provide us with crucial information about the size and shape of the room. They also help our brain locate where the sound is coming from.
But reverb is not made up solely of first reflections!
Indeed, as in all rooms, the emitted sound waves will bounce in all directions, from wall to wall, until their energy is completely dissipated in the room.
We will thus have what are called “late reflections,” which will reach the listener in a much closer manner: this is the tail of the reverb, which is therefore composed of inseparable reflections from one another.
These late reflections then take on the appearance of a diffuse sound, not really depending on the position of the source in the room.
Moreover, rather than measuring secondary reflections individually, we quantify them by talking about their density.
What affects the properties of a reverb?
The characteristics of reverb differ greatly from one room to another.
Typically, if you record in your living room, in your bathroom, in an underground parking lot, or in a church, you will have four completely different sounds — whether in terms of duration or frequency response.

To simplify, we can consider that these variations are mainly dependent on three parameters.
First, the materials present in the walls and objects of the room will play an important role. Particularly depending on their absorption capacity: a wall covered with a heavy curtain will resonate less than a wall covered with tiles.
Next, the size and shape of the room will also strongly influence the duration of the reverb. In a small room, the reverb will of course be much shorter than in a huge cave.
Finally, the position of the sound source and the listener (or, if applicable, the microphone) has an impact on the sound of the reverb, especially regarding the first reflections we discussed in the previous paragraph.
What is the purpose of reverb during mixing?
In the first chapter, we saw a detailed definition of reverb.
That said, this does not explain what it is used for in the context of audio mixing… and that is what we will look at now.
Why add reverb to a track?
Contrary to what one might think, adding reverb to a track during mixing is not just to give a sense of acoustic space.
Depth
When I mix a track and add a reverb effect, my first goal is often to manage the depth of the instrument in the mix.
Indeed, reverb has an interesting psychoacoustic effect since the more reverb you add to a recording, the more it seems distant.
(This means that adding a lot of reverb to a vocal track is probably a bad idea if you want it to stay in the foreground of your mix…)
Space
Next, adding reverb can help give a sense of realism and 3D space to a recording that may have been captured in a raw manner.
For example, if you record a classical quartet with microphones positioned very close to the instruments, it is highly likely that you will need to add some reverb to make the sound more pleasant to the ear and to place the instruments in a virtual acoustic space.
Cohesion
Another reason to use reverb: to bring cohesion to a mix.
Imagine you have several instruments that have been recorded in rooms with different acoustics.
If you try to mix them together, this difference will likely stand out, and you will struggle to create a sense of cohesion, that is, the impression of multiple instruments playing in the same place.
Reverb can then help recreate a common acoustic space for multiple recordings.
Smoothing
Finally, the last use of reverb: smoothing out errors.
On this point, I find it necessary to be cautious because reverb is anything but a magic wand.
However, it can help correct some minor recording issues, particularly by making frequencies a bit softer.
That’s why a solo voice often sounds much better with a bit of reverb than without…
Applications of Reverb
In principle, the reverb effect can be used for all kinds of tracks and sound sources.
However, let’s look at some examples of its usefulness on common sources, namely voice, guitar, and drums.
Using Reverb on Voice
The voice is often a major element of the mix, which we try to keep in a central and frontal position.
The ambiance it conveys is therefore particularly important: in some cases, you will need a muffled voice, and in other cases, you will need to give the impression that the singer is in a concert hall.
Adding reverb is therefore a common step in vocal processing, but caution is needed:
- If there is too much reverb, the lyrics may get drowned in the mix and lose their intelligibility. This will also have the effect of pushing the voice back in the mix, which is rarely desired.
- If, on the other hand, the track lacks reverb, you will have the sensation of a sound that is too dry, which can be unpleasant to the ear.
Imagine, for example, what Björk’s song would become with too short a reverb!:
Adding the right reverb and adjusting it well is therefore essential to place the voice in an acoustic space; it will also help mask certain imperfections in the voice as well as give it some thickness.
Using Reverb on Guitar
On guitars, the approach to reverb is quite different.
Indeed, it is sometimes used to add realism to recordings by placing them in a stereo space (I am thinking particularly of acoustic guitar recordings) — but more often, we seek to give depth to the guitar.
The approach is much more creative, with reverb often becoming an integral part of the instrument’s sound.
Moreover, some musical genres use reverb as a true special effect: without reverb, the sensations would not be the same at all:
Using Reverb on Drums
For drums, we are again in a very different use from the previous two cases.
In the 80s, the use of reverb on this instrument tended to make it stand out and give it a particular texture, but at the expense of any realism:
Today, on the contrary, reverb is more often used to create an illusion of space and bring cohesion to the drum kit, or to give a sense of power like “rock drums in a concert hall.”
However, the drums are sometimes mixed without reverb — the sound engineer relying on “room” microphones positioned in the room to manage the ambiance of the kit.
Be careful though: while the use of reverb can mask certain acoustic problems of the room in which the drums were initially recorded, it should not be overused, at the risk of distorting the sound of the instrument and making it less impactful.
The 6 Main Types of Reverb
There are of course many reverb algorithms, with each plugin editor or hardware reverb manufacturer offering its own innovations.
However, overall, reverbs can be classified into at least 5 major types, even 6.
To illustrate each type, an audio example will be provided, based on this raw drum recording:
Room Reverb
Room reverbs are the easiest to understand and design.
A Room is a space like the one you are currently in — or the one in which I am writing this article.
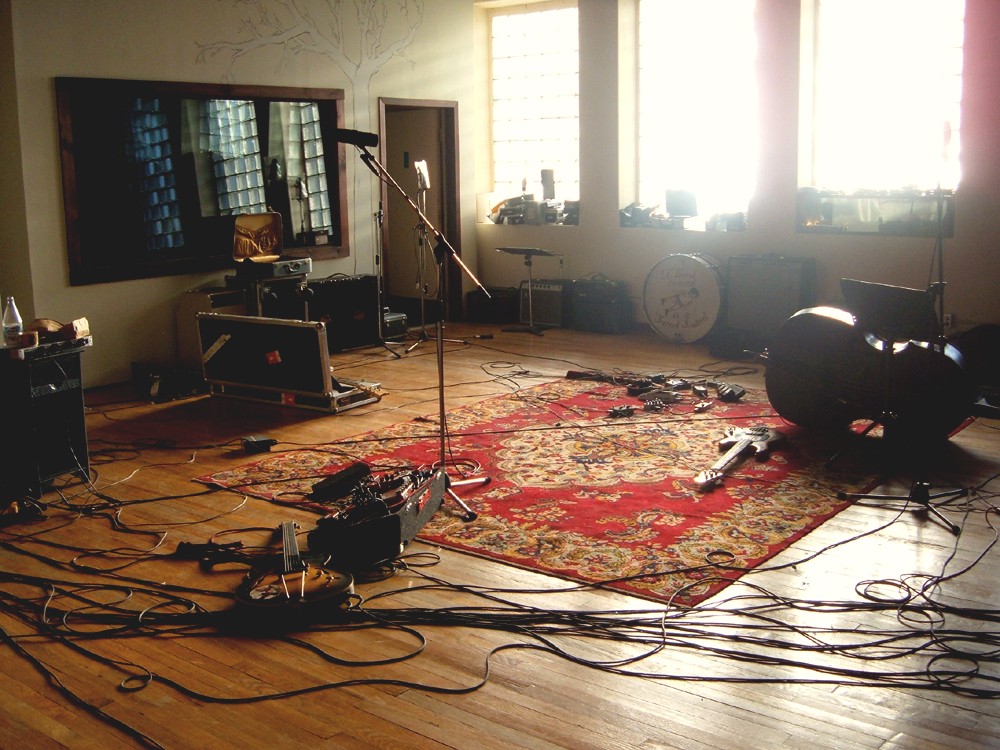
Of course, different sizes of Rooms are conceivable: a small closet can be a Room just like an underground parking lot.
Rooms, in fact, are spaces that bring a natural and lively color to recordings. As a result, they are very often used because they allow for easy addition of a bit of ambiance to any raw recording.
Even when subtly mixed with the base sound, a Room reverb can help adjust the ambiance of a track in a way perceived as natural by the listener.
Hall Reverb
A Room-type reverb, as we just saw, provides a realistic but imperfect sound. This makes sense: the characteristics of a room are rarely designed to enhance music.
On the other hand, it is the opposite in the case of concert halls, whose acoustics are designed to highlight the music played within them.

This generally results in a longer and deeper reverberation, as well as a larger room size.
Hall-type reverbs, precisely, aim to reproduce this type of reverberation.
Often, if you apply a Hall reverb to a track, it will become more pleasant to listen to. However, there is a catch: the duration of the reverb can quickly make your mix messy by masking the sound of other tracks.
This type of reverb should therefore be used with caution, especially on instruments like strings or synthesizers.
Chamber Reverb
Between Room, Hall, and Chamber reverbs, confusion can arise quickly: fundamentally, they all correspond to rooms…
However, Chamber reverb has nothing to do with the first two — but to understand what it is, we need to go back a bit in time.
Before digital reverb racks became available in studios, sound engineers sought to reproduce long and dense reverberations without having to record in a concert hall.
To do this, very specific rooms with particularly reflective surfaces were designed. It was then enough to position a speaker and a microphone in them to record convincing reverb sounds.
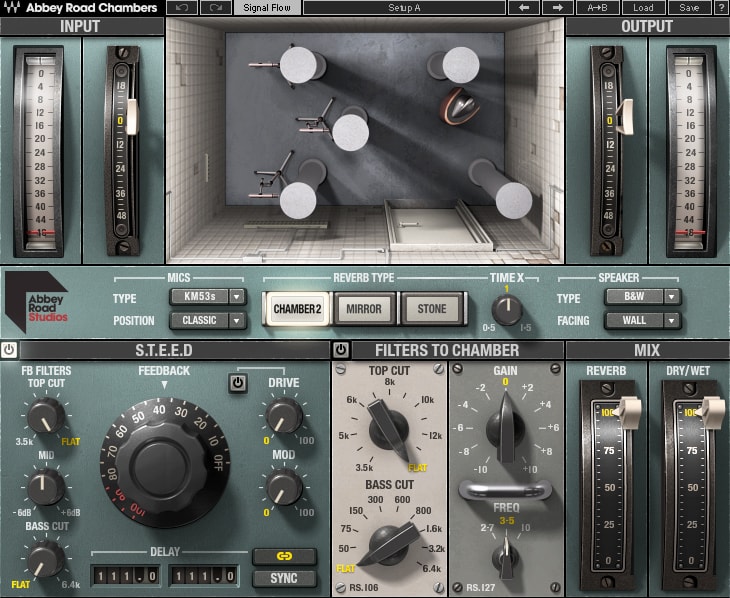
Thus, each major studio had (or still has) one of these “echo chambers” — for example, Abbey Road, which is now accessible to all home studios via a dedicated plugin from Waves.
Chamber-type reverbs correspond very precisely to this type of room. They tend to have a longer reverb tail than Rooms, while being clearer than Halls, making them effective on most instruments.
Plate Reverb
With plate reverb, we move to a type of reverb that does not correspond to a real 3D space, although designed to simulate one.
Specifically, a plate reverb consists of a large metal plate equipped with a device, similar to a speaker driver, that allows the plate to vibrate.

These vibrations are then captured using contact microphones — the whole producing a reverb effect that diminishes over time.
Generally, plate reverbs also have an absorbing block that can affect the characteristics (notably the duration) of the reverb.
In terms of sound, these reverbs offer a dense sound, but also a brighter sound at the beginning of the reverb than other types of reverbs, making them quite effective on vocal or snare tracks.
Spring Reverb
Spring reverbs operate on the same principle as plate reverbs, except that the metal plate is replaced by one or more spring(s).
This is typically the kind of reverb found in guitar amplifiers.

In terms of sound, however, it is nothing like plate reverbs: spring reverbs really have a… spring sound. Indeed, they produce very typical resonances with a lot of energy in the mids, making them particularly recognizable.
As a result, this type of reverb is rarely used because it is too unrealistic to be applied to all tracks in a mix.
Convolution Reverb
So far, we have seen the 5 main types of reverbs that exist.
However, there is still what I consider to be a sixth type, namely convolution reverb.
So what is it?
Specifically, a convolution reverb will use a sample recorded in a real place (for example, a room, a cave, a forest…). This sample is generally called an impulse response (IR) in English.
Through a fairly simple algorithm, it is then possible to simulate the reverb of the place where the impulse was recorded.

This means that you have the ability to send any track into your reverb and thus easily reproduce the acoustics of concert halls or famous studios by applying their characteristic reverb.
You even have the option to record your own Impulse Responses and use them in your mixes if this creative aspect interests you. I will write an article on the subject in a while, probably with a little video 🙂
For example, here is a simulation of the reverb from the parking lot of my residence, based on an Impulse Response that I recorded myself:
Reverb Parameters
There are a huge number of plugins and hardware devices that can generate reverb, each with its own specifics.
However, a certain number of settings are standard, so it is important to understand their meaning and their impact on the acoustic characteristics of reverberations.

Decay or Decay Time
The Decay is the duration (in milliseconds or seconds) of the reverb tail. A large room will have a significant Decay, while a small room will have a low Decay.
Size
Sometimes called Depth, this refers to the size of the simulated room. In the same idea as the Decay, a large Size will generate longer reflections.
Diffusion
The Diffusion controls the spacing between the different reflections, resulting in a greater or lesser sense of density of the reverb.
A reverb with a high Diffusion setting will have a rather enveloping but poorly defined sound, whereas a low Diffusion will give a more granular sound where you will start to feel the distance between the reflections.
Damping
The Damping controls the absorption capabilities of the simulated room. In other words, a high Damping means that the walls of the room are made of highly absorbent materials.
This setting generally translates into equalization shapes, which differ depending on the plugins. For example, a high-frequency Damping may take the form of an EQ shelf filter, while in the low frequencies it will be a bell filter.
Pre-delay
The Pre-delay is a particularly important setting that controls the duration (in milliseconds or seconds) between the initial sound and the first reflections.
To prevent a sound from drowning in the reverb, feel free to slightly increase this delay to slightly offset the reverb in time (20 or 30 ms may be enough!).
Tip: if your reverb does not have a Pre-delay setting, you can simulate one using a delay plugin set to create a single echo.
Equalization
Although you can of course add your own equalization plugin after your reverb, some plugins natively include equalization options.
Generally, all reverbs need to be slightly equalized, at least by filtering a bit of the lows and a bit of the highs — so you can rely on these built-in features for that.
Modulation Depth & Modulation Rate
Finally, many reverbs offer modulation parameters, generally called Modulation Depth and Modulation Rate.
These two settings allow you to add modulation within the reverb tail. This helps soften certain artifacts or, if you push the settings a bit, can lead to a sound that resembles more of a chorus.
The Modulation Depth parameter then controls the amount of modulation, while the Modulation Rate controls the speed of these modulations.
How to Adjust a Reverb?
Based on the previous chapters of this article, you should already have a good understanding of what reverb is and some ideas on how you can use one in your mixes.
However, I think it is important to add a proposed method to help you choose the right reverb and set it correctly when you add it to a track.
Here is what I advise you to do…
Step 1: Define a sound direction
Before adding a reverb plugin, you absolutely need to ask yourself a number of questions, such as:
- Do I need a realistic reverb, or not?
- Will a long reverb be appropriate? Or on the contrary, do I need something very short that will just add a bit of depth to the sound?
- Should the reverb be subtle or not? Dense, or not? Bright, or on the contrary very dark?
- …
To answer all these questions, you will need to choose the direction in which you want to take your mix.
Typically, if you are mixing a classical music piece, you probably won’t choose a reverb with very modern and creative sounds. On the other hand, if you are mixing a rap track, you might allow yourself more latitude in choosing the reverb.
Tip: Don’t hesitate to rely on reference mixes, that is to say, tracks from other artists that resemble what you want to do with your own track.
Step 2: Choose the reverb
Based on the elements mentioned in the previous paragraph, you should be able to choose your reverb quite easily.
It might be hardware that you have in your studio, or rather plugins.
(Feel free, by the way, to check out my selection of free reverb plugins if you are looking to diversify your collection…)

Once the plugin is added, if when you make your adjustments you realize that you can’t get the sound you want, don’t hesitate to switch to another plugin
Indeed, each effect has its own sound signature, and the plate reverb that worked very well on your previous track may need to be replaced by another plate reverb on this new track you are mixing.
Note: if your reverb seems too dense no matter what, don’t hesitate to try a delay plugin instead.
Step 3: Browse the presets
Some methods might recommend diving directly into the settings of your reverb.
The problem is that if you are a beginner, you won’t master them enough to do something really good — and if you are a bit more experienced, you won’t want to waste time recreating a set of settings from scratch.
Therefore, the method I propose here is much more pragmatic.
Indeed, I simply advise you to start by browsing the presets of your reverb plugin.
If you have been following Projet Home Studio for a while, you probably know that I am not fond of presets when it comes to EQs and compressors, but for reverbs, I find they have a real advantage.
So browse through the presets of your plugin, one by one, until you find one that sounds roughly like what you had imagined.
As soon as you find one, you can move on to step 4.
Step 4: Adjust the settings
Once you have found a preset that matches what you needed, this is when you can dive into the settings.
You like that spring reverb sound, but you would like it to be a bit longer? Adjust the Decay.
You appreciate the Room sound produced by a preset, but when you listen to your mix, you feel it is too long and too bright? Try adjusting the Size and Damping options.
The reverb is drowning the original sound a bit too much? Maybe a higher Pre-delay could help…etc.
Step 5: Equalize your reverb
Once the sound of your plugin suits you, I strongly advise you to bring out an equalizer to adjust it.
Indeed, it is essential to pay particular attention to the lows and highs.
Just because a reverb sounds great when you listen to it alone doesn’t mean it will always sound good when you integrate it into the full mix.

Often, energy will accumulate in the lows and mids, which will make the mix confusing and messy. A high-pass filter should help to correct this type of problem.
In the same vein, too much energy in the highs of your reverb may make it too audible, causing it to stand out too much. If that’s the case, a low-pass or high-shelf filter will likely help you control those high frequencies.
Step 6: Adjust the reverb level in the mix
Final step: the level.
Take the time to properly adjust the level of your reverb in relation to the other tracks.
Generally, since you will have placed your reverb plugin on an auxiliary track (in SEND), adjusting this level will be really easy.
However, be cautious: often, with reverb, it’s better to go gently to avoid drowning the track or overshadowing the rest of the mix.
If necessary, don’t hesitate to vary the reverb level according to the sections of your song thanks to automation.
In conclusion
There you go, between the method you’ve just seen and all the information contained in the rest of the article, you should have all the tools to use your reverbs in your mixes.
To further your learning in mixing, feel free to also read my article on equalization! 🙂